 |
Realistic Frozen Text In Photoshop |
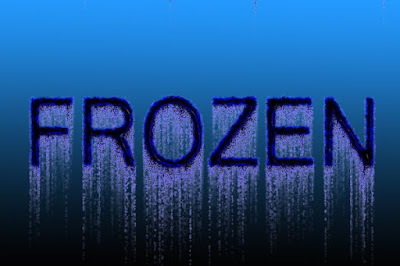
In this tutorial we are going to create a frozen text effect with the help of adobe Photoshop.It is a very popular and eye catching effect.This text design is a very useful for every graphics designer.I create the frozen text inspired from a movie poster.To create this text effect we used Photoshop filter menu,adjustment panel,blur,layer style,Photoshop channel panel etc.Finally it has become a great text design which I named as "Frozen text effect".
In today's tutorial we are going to How To Create Realistic Frozen Text Effect In Photoshop-Photoshop Tutorial
In this tutorial we will learn about How To Create Realistic Frozen Text Effect In Photoshop-Photoshop Tutorial
About The Tutorial
2) Estimated Time-(Approx)-10 minutes
3) Difficulty facing-To create frozen text effect in Photoshop
4) Topics we covered- how to use free transform tool in Photoshop,use filter menu in Photoshop,use channel in Photoshop
Similar Tutorials From other websites (You can watch)
1) Create Realistic Frozen Text Effect In Photoshop from psdvault
Some necessary tips & Tricks we used to create the tutorial
Watch in Details about How We Made the Tutorial Exactly, you can watch the video
In today's tutorial we are going to How To Create Realistic Frozen Text Effect In Photoshop-Photoshop Tutorial
In this tutorial we will learn about How To Create Realistic Frozen Text Effect In Photoshop-Photoshop Tutorial
About The Tutorial
1) Software we need-Adobe Photoshop CC
2) Estimated Time-(Approx)-10 minutes
3) Difficulty facing-To create frozen text effect in Photoshop
4) Topics we covered- how to use free transform tool in Photoshop,use filter menu in Photoshop,use channel in Photoshop
Similar Tutorials From other websites (You can watch)
1) Create Realistic Frozen Text Effect In Photoshop from psdvault
Some necessary tips & Tricks we used to create the tutorial
1) At first I have to create a new document(width-600px,Height-400px) and fill the document with black color.
2) Then I go to select text color(white) and write a text(Frozen)
3) Now adjust the text on background.
4) Then select two layer and merge two layer(shortcut-ctrl+E)
5) Now I go to filter>pixelate>crystallize,cell size is 3 then OK.
6) Now select the text with channel panel and go to image>image rotation>90 degree cw.
7) Then I go to filter>stylize>wind and adjust the wind then OK.
8) Now I go to image>image rotation>90 degree ccw.
9) Now I go to select text with the channel panel.
10) Then I go to create a new blank layer and fill the text with black color.
11) Now I go to apply text effect with layer style option.
12) Now I go to select text layer and fill the background with gradient color.
13) Then I go to apply some effect with the help of filter gallery.
14) Now I go to adjust the text color with the help of hue & saturation.
15) Now our final text is ready for use.
Watch in Details about How We Made the Tutorial Exactly, you can watch the video
Conclusion- This tutorial presents a basic idea about selection and How to perfectly use it in Photoshop. We used only frozen effect on text. I hope with the help of above tutorial you will to able to create that type of effect very professionally.
If you faced some problem regarding this tutorial you can contact me via contact us.
Don't forget to leave a comment suggestion about anything regarding Photoshop.


0 comments:
Post a Comment