 |
| Sepia Effect |
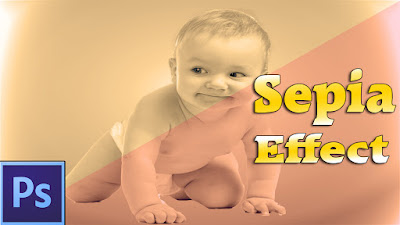
It is a popular effect of photoshop which contatin a redding-brown coloring touch to every image.With this effect(sepia toning) image looks a warm,tint feeling.It's really easy to create that type of effect with photoshop.If you are interested to create that effect,the tutorial below is definitly help you.
In today's tutorial we are going to How To Create Sepia Effect In Photoshop-Photoshop Tutorial
In this tutorial we will learn about How To Create Sepia Effect In Photoshop-Photoshop Tutorial
About The Tutorial
3) Difficulty facing-To create sepia effect in photoshop
4) Topics we covered- how to use lenscorrection in photoshop,use photo filter in photoshop,how to adjust color in photoshop
Similar Tutorials From other websites (You can watch)
1) How To Apply a Sepia Tone to a Photo in Photoshop from graphicssoft
2) How to create a sepia toned phot in photoshop from picturecorrect
Some necessary tips & Tricks we used to create the tutorial
Conclusion- This tutorial presents a basic idea about photo filter in photoshop. We used only sepia color of a image. I hope with the help of above tutorial you will to able to create that type of effect very professionally.
In today's tutorial we are going to How To Create Sepia Effect In Photoshop-Photoshop Tutorial
In this tutorial we will learn about How To Create Sepia Effect In Photoshop-Photoshop Tutorial
About The Tutorial
1) Software we need-Adobe Photoshop CC
3) Difficulty facing-To create sepia effect in photoshop
4) Topics we covered- how to use lenscorrection in photoshop,use photo filter in photoshop,how to adjust color in photoshop
Similar Tutorials From other websites (You can watch)
1) How To Apply a Sepia Tone to a Photo in Photoshop from graphicssoft
2) How to create a sepia toned phot in photoshop from picturecorrect
Some necessary tips & Tricks we used to create the tutorial
1) At first open stock image(baby) with background.
2) Then I go to Filter>Lens correction and the go to apply effect(select custom,amount-+100,midpoint-+88)
3) Then I go to black and white effect on image(simply go to layer>new adjustment layer>black & white)
4) Now I go to layer>new adjustment layer> curves and adjust the curves.
5) Now I go to layer>new adjustment layer> photo filter and adjust the photo filter.
6) That's it! Now sepia effect is ready.
Watch in Details about How We Made the Tutorial Exactly, you can watch the video2) Then I go to Filter>Lens correction and the go to apply effect(select custom,amount-+100,midpoint-+88)
3) Then I go to black and white effect on image(simply go to layer>new adjustment layer>black & white)
4) Now I go to layer>new adjustment layer> curves and adjust the curves.
5) Now I go to layer>new adjustment layer> photo filter and adjust the photo filter.
6) That's it! Now sepia effect is ready.
Conclusion- This tutorial presents a basic idea about photo filter in photoshop. We used only sepia color of a image. I hope with the help of above tutorial you will to able to create that type of effect very professionally.
If you faced some problem regarding this tutorial you can contact me via contact us.
Don't forget to leave a comment suggestion about anything regarding photoshop.

0 comments:
Post a Comment